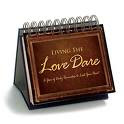
 I saved the best for last. I LOVE this KEEPSAKE CALENDAR ALBUM! It is fairly quick to put together and is super duper easy. I said "fairly quick" because, let's face it, IT'S A TWELVE TO FOURTEEN PAGE ALBUM you're putting together. The finished product is oh-so-cute and keepable. Your loved ones will cherish this gift for years to come.
As you can see I've bound mine but they work great in 6x6 albums as well. Any office supply store will bind them for very little expense. I used a home binding tool such as the Zutter Bind It All.
You can request the CALENDAR KIT by emailing me with your order. Keep in mind there will be no orders for kits taken after THIS SUNDAY, November 30th. When you email me, just ask for the CALENDAR KIT. You can make a request for specific Designer Series Paper (find these on pages 168-171 of the Idea Book and Catalog.) I have several DSPs but if I do not have the one you request I will ask for your second choice. These Keepsake Calendar Kits are only $15. Everything in the kit will be precut for you.
If you'd like to just jump in and start making these calendars now... here are some instructions to help you along. THE ENTIRE CALENDAR USES ONLY ONE PIECE OF DSP! Isn't that fantastic?! And with the calendar itself only costing $2 from Wal M, you can save a bundle on Christmas gifts!
Keepsake Calendar Album
Supplies:
Designer Series Paper
Coordinating 12x12 Card Stock (2 of one color and 1ea of 2 other colors, ie. red, red, blue, and green)
12x12 Cutter (a MUST for this project!)
Ribbon and Embellishments (will vary depending on how much you wish to decorate.)
6x6 store bought calendar
Optional...
as I said, you can have your calendar bound and hole punched at your local office supply store. OR, you can use a home binding tool and the Cropadile (to hole punch the hanging area.)
 3. Trim this piece to 5.1/2 x 6. Set the 6 x 6.1/2 piece aside. Trim 1/2" off of the 5.1/2 x 6 and save for later.
 4. With 5.1/2 x 5.1/2 piece in cutter, CUT OUT center leaving a 1" border.
 5. With the piece that was cut out, cut it corner to corner. Set aside.
 6. Going back to the 6 x 6.1/2, cut it at 2.1/2 x 6.
 7. Tear the 2.1/2 x 6 piece down the center.
 8. Cut remaining piece to create a 4 x 4 piece and a 2 x 4 piece.
 9. Cut the 2 x 4 piece into 1" squares and set aside. Cut the 4 x 4 piece into 2" squares and cut them corner to corner.
*
11. With the remaining 6 x 6.1/2, make three more cuts... one at 2.1/2, one at 2, and one at one. (I apologize. My picture only shows two cuts at this point. You will need the extra piece so please follow the written instructions. From #11 you should end up with one 2.1/2 x 6 piece, one 2 x 6 piece, and two 1 x 6 pieces.)
*
12. Cut all colored card stock pieces to 6x6. Now you are ready to assemble and decorate. This is up to your personal preference. My Virtual Workshop will end my posts for this years blogging.
*
If I have time, I plan to post picture of my own personal Keepsake Calendars which I plan to give as gifts. So check back from time to time if you need inspiration on how to decorate your pages.


3 comments:
Hi KellyJean. Love your blog. Thanks for the virtual workshop. What a fantastic idea. Is there any way you could show us one of your completed keepsake calendar photo albums? I love this idea. You are a very talented, creative person.
Hey Linda! Thanks for the comment and the sweet words of compliment! Working up and loading all of the Virtual Workshop projects was a TON of work (worth it, cause I love to share but a ton never-the-less.) I hope to upload some ways to deco the calendar pages in the future. After this weekend, it's Christmas time for me and my family which means... little stamping and lots of lovin'. Check back in the future to see those page ideas. And thanks again! I really appreciate YOU.
Love your blog and all your wonderful ideas.... you make it seem so easy. So this week, I will be trying several projects. I too would love to see a little bit more of the finished calendar. I love the idea!
Again, many thanks and Merry Christmas!
Denise
Post a Comment