Okay, how cute is this gift card wrapper?! And EASY... let me tell you how easy it is to create! Well, actually... you will have to tune into my VIRTUAL WORKSHOP coming up THE DAY AFTER THANKSGIVING for all the details on this gift card wrapper and many many other fantastic gifts for the holidays. Stampin' Up! will also have a Holiday Extravaganza Promo going on. Oooooh, with so many fun things going on, I can hardly contain myself! Hope you'll join me at the Virtual Workshop. Just tune in here to my blog the day after Thanksgiving and enjoy the holiday dance! Sunday, November 2, 2008
Virtual Workshop Sneak Peak #1
Okay, how cute is this gift card wrapper?! And EASY... let me tell you how easy it is to create! Well, actually... you will have to tune into my VIRTUAL WORKSHOP coming up THE DAY AFTER THANKSGIVING for all the details on this gift card wrapper and many many other fantastic gifts for the holidays. Stampin' Up! will also have a Holiday Extravaganza Promo going on. Oooooh, with so many fun things going on, I can hardly contain myself! Hope you'll join me at the Virtual Workshop. Just tune in here to my blog the day after Thanksgiving and enjoy the holiday dance! Thursday, October 30, 2008
Choose LIFE... vote wisely, please.

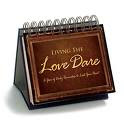
This is a little book I made last year for for my nephew's girlfriend's baby-to-be. Circumstances weren't exactly what my nephew and his girlfriend had planned, I am sure. Let's face it... no child says, "I want to grow up to be a parent while still in high school. Ya, that would be fun." No. God gives us choices. And LIFE happens. Daniel and Jennifer very easily could have decided a baby was not what they should have to be tied down with at age 17. As one of the presidential candidates put it... he didn't want his daughters to be "punished with having a child" if they immaturely got pregnant.
I am SO (and I mean SO VERY) grateful my nephew and his girlfriend did not see their unborn child as a "punishment." I am so glad my nephew and his girlfriend decided to CHOOSE LIFE by allowing thier sweet little Danielle to bless our world and family. And let me tell you... bless our family, she has! She is a fireball of life and energy. The child only smiles, giggles and RUNS now a year after her parents made an otherwise impulsive decision followed by the right thing to do.
Soon we will vote on a new president for this great country we live in. Please vote wisely. Be informed. And if you are a Christian, VOTE THE BIBLE. I will say it again... vote God's Word. Is there any issue more important than LIFE, itself? There are many many issues. But is there any more important? As a Believer in Christ, I MUST say no, there is no issue more important than the sanctity of life. Please vote wisely.
Wednesday, October 29, 2008
Happy Libby's Day!
We are celebrating Libby's Day for some dear friends of ours. Libby was born two year ago (or was it three... time flies. it really does) with Trisomy 13. Normally, these angel kisses (babies born with Trisomy 13) don't last but a day (IF that long) here in this rough world. Libby, however, stayed around to share her kisses with us for right at two weeks. Talk about rough... thinking each day our beloved friends could defy the odds of this disease. God, however, seemed to feel the same way about little Libby that we did... He just didn't want to live without her. Therefore, He welcomed her back home with the angels on November 13th.God's heart is breaking for each one of us to be back with Him. That is why life is so tough sometimes and this world seems so cruel. (This is just my fun little way of dealing with things, of course.) God wants us to live and experience His creation and yet, He can't stand us to be away from His very presence. Until one day, He calls to us and asks us to spend eternity with Him in His incredible love. Libby answered His call.
If you are reading this, you are beyond the ability of Libby's willingness to answer the call. However, you are able to BE READY to answer God's call with a different kind of willingness. Are you ready? Have you personally asked Jesus to be King of your life? You can do that RIGHT NOW. Just whisper that prayer and ask Him into your heart. Then speak to a friend or pastor who knows Jesus personally and find out more about being ready to answer God's call. You WILL be blessed.
As for Libby's Day... I'd ask that you leave a sweet comment of encouragement here for my friend and her family as they miss Libby and celebrate the memory of their precious angel kiss. Thanks!
Saturday, October 25, 2008
Could there really be another ME?
OH... MY... I never would have thought there could be more than one Kelly Jean! Well, as we all know by the cute little lines on our fingers that God truly did create ONLY ONE ME. However, just look at this beautiful RAK card sent to me by none other than KELLY JEAN GRAY. Ya! Not only is her name Kelly Jean but she has the same last initial as well!!! How freaky (but in such a fun way) is that?!Some time ago, I suggested to everyone to try and "google" themselves. It might be kind of fun to see what you come up with. I suggested this only because my niece, Kathleen, did so and what she found was ME. he he he. Go ahead! Try it!
Kelly, thanks so much for this lovely LOVELY card! What a fun RAK!
Monday, October 20, 2008
Think Pink
I created this card for this week's NMBS challenge. Check it out here NMBSwaps . Barbara encourages us to "think pink" in honor of this month's Breast Cancer Awareness.
I CASEd (that's copied) this card from the Stampin' Up! Idea Book and Catalog. Look at page 39 and you will see that I changed it up a bit. I really LOVE the samples in the IB&C but very rarely CASE any of them. I'm not sure why this is except something in me just HAS to create. However, I'm always telling stampers, "You don't have to BE creative to FEEL creative. Just COPY!" And I mean it! Why spend precious time thinking and thinking up new designs when there are so many out there available to us?!
If you are like me and simply HAVE to create, CASE with a few changes. Always be sure to give credit where credit is due if possible. Then SHARE, SHARE, SHARE. Leave a sweet comment here if you like what you see and include a link to YOUR CARD inspired by mine. I'd love to see what you came up with!
Wednesday, October 15, 2008
Jessica's Gifts
Despite my love for and loyalty to Stampin' Up!, I absolutely adore Bella Stamps! This anorexic hip chic is just so stinkin' cute. What is it about her?! I created this card and these gifts for a dear friend's daughter-in-law and her first sweet gift from God.The album is a "Book of Blessings." One page is for a pic of the baby while the other side is for a friend or loved one's words of blessing. Jessica had the album at her baby shower for her guests to write their blessings in as they arrived. The tin is filled with more note cards for additional blessings in the case of which the book was filled.
I just love this Bella image. I trimmed out the belly and popped it up. Oh how I wish the photo could have gotten the effect better. It cracks me up just looking at it IRL. The belly is all pokin' out... as it should be, he.
My blessing for Adam and Jessica is for every "LAST" to be more enjoyable than the "FIRST." Many times we parents get so caught up in the "firsts" that we forget to enjoy the "lasts" just as much. I never cry on the first day of school. I always cry on the last. I enjoy the last game of the season more than the first, the last day of summer camp more than the first... those sorts of things. I believe the "lasts" are God's way of saying, "Look! Just look what I've done with your precious one. And just wait til you see what's next!" Ahhh, yep... THAT I love! May you always enjoy the "lasts." Thursday, October 9, 2008
Super Sweet and Sassy Sis
Check out these amazing gifts my sweet and sassy sis sent me! Imagine how special I felt when I got this wonderful package of goodies for my b-day! Although my b-day is long gone, I am constantly reminded of my friendship with my little sis, Sabrina. (Sabrina became my little sis through a fun secret sister game. She really is like a sis to me!) I love her sassy spirit but most of all I enjoy her sweetness. Oh! And her talent... now you get to enjoy that as well. Thanks bunches again, Sabrina. You SO ROCK!!!Monday, September 29, 2008
Warm Wishes BATIK
Try a New Technique! For this card, I used the brand new stamp set Winter Post from Stampin' Up!'s Holiday Mini Catalog to begin selling day after tomorrow. I LOVE this mini! It's full (I mean FULL) of great stuff. If you haven't gotten your mini catalog in the mail already, check it out online. And be sure to let me know you need one. I will reserve your copy and have it waiting for you at the next Stamp Club (Sunday, October 26.)This technique is called the BATIK Technique and it is featured on SCS today. I used the ink refills Elegant Eggplant (which ended up looking like Perfect Plum so I decided to use Perfect Plum card stock) and Ballet Blue. Aren't they just lovely together?! Here are the instructions given to us by Lynn on SCS...
What is Batik?
The word batik (pronounced Bateek) means "wax written" and this is basically what batik is. It is a way of decorating cloth by covering part of it with a coat of wax and then dyeing the cloth. The waxed area keeps its original color and when the wax is removed the contrast between the dyed and undyed area makes the pattern.
What you'll need today:
Stamps
Watercolor paper
Versa mark
Clear Embossing Powder
2 or three Classic re-inkers
Water spritzer bottle (mini mister works great) - one for each color of re-inkers you will use
2 sheets of text weight paper (copy paper)
Iron set on high - no steam
Step 1: Stamp your images using versa mark onto your watercolor paper. Apply your clear embossing powder and heat until embossing powder is melted.
Step 2: A. Get your colorwash or make your own by placing several drops of re-inkers into a mini mister (or similar small spray bottle) and then adding water to the mister. I didn't measure my drops of re-inkers, but rather just added enough water to provide the desired color intensity. Shake to mix.B. OK, ready? Now mist your colors, one at a time, onto your embossed watercolor paper, dabbing with a paper towel if you get too much color, or to help blend blobs you may get. NOTE: Keep in mind, when misting colors onto the paper that two different colors mixed together will make a third color. Like in my sample, I mixed pink and blue and got the purple shade you see. So while it may look like I used three different colors, I only used two.
Step 3: Now place your watercolor paper onto a sheet of your text weight paper (embossed side facing up) and place another on top of your watercolor paper (to protect your iron). Using your iron press the watercolor paper until the embossing is melted and absorbed into the copy paper. You can check to see if it's all done by lifting the copy paper and if you still see shiny embossed areas, keep ironing.
Now step back and admire the beauty you have created. Now, just complete your card as desired. It's such a fun an easy way to create a big WOW. I hope you will give it a try.
Saturday, September 27, 2008
Sketch Challenge #1 Creations
Here are two of my takes for the challenge posted to you here on the left of my blog. I REALLY like this sketch because I love working with the circle punches... or any punches for that matter.*
Have you ever noticed ALMOST ALL of the samples in Stampin' Up!'s Idea Book and Catalog have SOMETHING TRIMMED OR CUT OUT? Ya, check it out. Go to your catalog... (what? you don't have a catalog?! you need to email me right now and let me take care of that. wink.) look at at least five samples and see if there is something on each of them that has been cut out.
*
Since I don't have time to CUT THINGS OUT all of the time, the next best thing to create this appearance is to PUNCH IT! Thus my reason for lovin' this sketch. My second sample sports blossoms punched with the Boho Blossom Punch and the 1/4" Circle Punch.
*
SAMPLE #1 Uses the Holiday Blitz stamp set. I stamped the leaves in Kiwi Kiss on Kiwi Kiss. Then colored them in with the Versamarker (LOVE the Versamarker for this technique!) I used my Tangerine Tango ink pad on my pumpkin to coordinate with the Haiku (bless you!) DSP. Then I MARKERED over the stem and vine of the pumpkin with my Chocolate Chip and Old Olive Markers. SO EASY!
*
SAMPLE #2 Uses the same beautiful DSP (no sneezing this time, he) only I "flipped" it with my card stock. I added some pretty to the blossoms by using the Pretties Kit. I LOVE the Vanilla Taffeta Ribbon. It is just so lovely! I only used a bit of it by tieing it onto my Chocolate Chip Grosgrain Ribbon. Then MAJOR TIP MAJOR TIP... I added a bit of Tombo Liquid Glue to the knot so it wouldn't untie or shift! My "Warm Wishes" from the stamp set Hugs and Wishes was suppose to end up a bit lower so as not to get into my flourish from Baroque Motifs. Rrrg! That is what I get for not using my Stamp-a-ma-Jig!
Monday, September 22, 2008
Septen-ten-tenber Stamp Camp
At the Septen-ten-tenber Stamp Camp THIS SUNDAY, SEPT. 28th from 6:30 to 8:30pm, we will create TWO EACH of the cards you see here in this post. TEN CARDS that take less than TEN MINUTES to create for only TEN DOLLARS... now, THAT is a bargain! Email me to register. Pay at the camp. If you end up unable to attend the camp, please be prepared to pay. Your card kits can be picked up any time or mailed to you.The card you see above uses the "cover-all glitter" technique.
SO pretty!
Wednesday, September 17, 2008
BOXtober is coming soon!
My second annual BOXtober Stamp Camp is scheduled for Sunday, October 26 from 6:30pm to 8:00pm.Mark your calendars NOW and send in your registration fee to save your spot. Seating is limited and will fill up quickly. I will open a second date if attendance demands.
This camp includes ALL SUPPLIES needed to create everything you see above and below in this post. Everything will be precut and prescored. All you do is have fun putting it together and stampin' where neccessary. How about that?! Plus you will receive step by step instructions so you can go home and make more. Consider your Christmas gift giving taken care of now!
All four of these adorable boxes along with the gifts inside the boxes were made from only half of one Stampin' Up! Simply Scrappin' Kit! Can you believe it?! Just wait til you scroll down to view what all this camp includes. Check it out!
The box you see here above includes five precious little notecards and envelopes.

This box pictured above includes ten sweet little Christmas gift tags.
See inside pages of this album below.


See the front and back view of this abulm below.

You make all EIGHT PROJECTS (well, actually it's more than eight if you count all the notecards and gift tags) at this Stamp Camp for only $25. As I said, all supplies are included in this camp fee and everything is precut and prescored for you. Save your spot early by sending your camp fee to me right away. Contact me by email to tell me you are ready to register. This would be a great camp to do with friends. So get those stampin' buddies together and get those Christmas gifts completed in a jiffy! Email me right now!
Although the benefit of attending the camp is personal assistance, you can also order the CAMP KIT (all supplies plus step by step instructions for everything you see shown above) and everything can be mailed to you for the same cost of only $25 which includes postage. Email me with inquiries.
Love you THIS Much!
I love this card THIS much! he he he... Seriously, the "Under the Stars" stamp set from Stampin' Up! is quickly becoming one of my favorite sets! The minute I saw this little guy in the catalog, I just knew he was saying, "Love you THIS much!" Unfortunately, SU! didn't realize he was saying it because the phrase is not included in the set. Hm. Soooo... I had to hand write that part. I guess it turned out alright. I used the little heart image from the "Moose You" stamp set.If you would like to have the Under the Stars stamp set at a 15% discount, act fast and contact me as this discount will only be available until the end of September! To see all of the images in this set, check it out at http://www.stampinup.com/ or contact me for your very own Stampin' Up! Idea Book and Catalog. Better yet! Host a workshop (PARTY) and I will show you specifically how I made this adorable card. Email me today!
Monday, September 8, 2008
Holiday Gift Packaging
Stamp Club this past Sunday was a BLAST! We did things with the Big Shot that turned out "oh-so-cute!" If you missed this past club, not to worry. Our next get-together is on Sunday afternoon, September 28th from 2:00 to 6:00. Immediately following Stamp Club will be our Septen-ten-tenber Stamp Camp from 6:30 to 8:00pm. Check back soon for pics of the projects we'll be stampin'.This holiday gift bag was demoed at this past Sunday's club. It is SO SUPER EASY to create. This is my absolute favorite way to package any gift for the holidays. It's fast. It's inexpensive. And it's fabulously gorgeous!
I used the 4x8 white sacks from Kaiser's in New Albany. First, I trimmed the sack to 6". The front piece is from the absolutely beautiful Holiday Treasures Designer Series Paper by Stampin' Up!. It measures 4.1/4 x 6. The back piece is a 4.1/4 x 8 piece of Kiwi Kiss (gotta love those In Colors!) I stamped on both using Baroque Motifs (with Chocolate Chip and Kiwi Kiss.) I used this stamp set to coordinate with the little swirls in my "for you" image. Love, love, LOVE this year's Ronald Mc Donald House Charities Stamp Set! A sets of four squared images that coordinate with SU!'s new Scallop Square Punch. Love it! I stamped that image in Riding Hood Red and then punched with the Scallop Square Punch.
Be sure to attend Stamp Club on September 28th! You just might win this beautiful package as a door prize! Oh, and wouldn't it be yummy if it were filled with something sweet?! Hmmmm... stamps are always sweet to recieve, huh? wink.
Wednesday, September 3, 2008
Big Shot Grab Bags
I am absolutely LOVIN' the new Stampin' Up! BIG SHOT!!! Look at these fun things that can be created with only a couple of dies! Aren't they great?! The card above is the FREE make & take we will be making at this Sunday's Stamp Club. You won't want to miss it since club is FREE itself. You need only place a minimum order of $15 while at club. Members receive special bonus. Everyone gets to make the card above and KEEP IT. It was created with the help of the BIG SHOT.
The items below were also created with the help of the BIG SHOT. Everyone attending club this Sunday will receive a goodie bag filled with an assortment of precut dies to play with. The basket and birthday card you see below are part of what fill the goodie bag. This is yours FREE just for attending this Sunday's club.
It's going to be FUN! Better make plans now for a little stampin' R&R at Stamp Club!
Saturday, August 23, 2008
Stampin' Up! goes BIG with the Big Shot
As promised... here are some Big Shot projects, all created by using the brand new Stampin' Up! dies and Big Shot machine. How adorable is the basket you see above?! This basket was created with a long 12" die called "Baskets and Blooms." I must say it is quickly becoming my absolute fav. If you are a "gift giver" this die is a must have. Can you imagine how fast and easy this basket will make our gift giving?! I can just see it filled with everything from Hershey Kisses to jewelry to you name it!I rolled the So Swirly wheel on my basket before putting it together. The blossom was built by using the Scallop Circle Punch as a base and the same 12" die for the rest.
This card is so simple and says it all when it comes to a "thank you." These blossoms were built from the 12" die mentioned above. The "Top Note" die was used to create the framed notion containing my message.
And oooooohhh... I just LOVE the "Peace Joy Love and Cheer" die! Look how fantastic it looks on this scrapbook page. I can't wait to play with this die and create greeting cards with it! Can you imagine how cool these words will look when they are seperated?! The little journaling box was created by using the "Scallop Envelope" die. I simply folded the side back and adhered it to the mat. See below how it opens. OH! And the white area on my red mat is actually the NEGATIVE piece from the red scallop on the greeting card pictured above. Pretty cool!
Subscribe to:
Posts (Atom)