"And hope does not disappoint us,
because God has poured out his LOVE into our hearts by the Holy Spirit..." Romans 5:5

Friday, April 9, 2010

Always Stampin'!

This is my last post on "Dancing with Stamps."
Please join me on "ALWAYS STAMPIN'"
where I'm "always stampin' always Stampin' Up!!"
*
I plan to leave this blog open so you can
browse back through all the fun and creative projects
that have danced with me on my journey.
*
Thank you so much for doing the paper crafting dance with me!
I hope to hear from you at
*
A sweet Mother's Day wish
to all of you moms as well as
those of you that have mothered anyone with your love!
Enjoy the woman God made you!
Blessings!

Monday, April 5, 2010

Shimmer Mist

If you are visiting FROM MOSD,
and wish to find my recipe for
"home-made" SHIMMER MIST,
stroll down to the very bottom of this post.
*
Spring has finally sprung!
I pray that each and every reader of MOSD
had a lovely and blessed Easter!
*
Today's gift from MOSD may be a bit obvious...
a mini book that utilizes the
PERFECTLY SHAPED PAGES.
When considering projects with MOSD products,
I am always drawn to these pages.
I enjoy creating mini albums and mini booklets so
naturally, I LOVE these sturdy little, fun shaped treasures!
The are PERFECT for little books of memories or what-nots.
*

I have some dear friends about to embark
on a spiritual journey of training
that will take them through the next few years of mission work.
I figure they will need a little notebook of sorts
to jot down notes and quotes,
or just keep track of their own thoughts.
*

So I utilized the
POSTAGE STAMP PERFECTLY SHAPED PAGE
to act as my booklet cover and the
SQUARE PERFECTLY SHAPED PAGE
to act as the booklet back.
Then I inserted regular notebook paper
timmed to 5x5" every other page of
card stock trimmed to 6x6"
(each piece of card stock is trimmed 1/8" to 1/4" smaller than 6x6.)
*
Some of the card stock pages are left blank
so my friends can use them as needed.
Perhaps they might adhere a family photo to keep them encouraged
or a photo of someone they treasure during their training.
*

The second to last page holds a bookmark
that will surely be helpful with tracking the scriptures.
*

The pocket holding the bookmark was created
by simply trimming a piece of decorative paper
to 3x6" and folding down a 1" portion of it
to expose the beautifully decorated opposite side.
*
I left the final pages completely blank, as I said,
for their own treasured memories
whether they be words of encouragement or endearing photos.
*
 
The polished stone look of the front and back covers
were created by simply using a sponge and craft ink.
I "rubbed" the inked sponge all over the
Perfectly Shaped pieces until I had my desired look.
Then I edged the pieces with another color.
*
I spritzed the front and back covers with
some "home-made" shimmer mist.
It sparkles like all get-out!
Unfortunately the photo doesn't show it like IRL.
Stroll down to the bottom of this post
for my "home-made" recipe of Shimmer Mist.
*
Mini books, whether as albums or a simple notebook
(like the one shown here) can be so much fun
because they are fast and easy to create.
Let MOSD make the process even faster, even easier,
and WAY MORE FUN with the
PERFECTLY SHAPED PAGES!
*
Enjoy your spring!


RECIPE FOR SHIMMER MIST
Supplies needed:
#71 Platinum (or any color) All-Purposte Ink for Fantastix from Stampin' Up!
high alcohol content hand sanitizer
travel spritz bottle
toothpick
 
How to...
1.  Fill spritz bottle 3/4 full with hand sanitizer.
2.  Finishing filling bottle with H20.  (Do not overfill.)
3.  Using toothpick (being careful NOT TO TOUCH acohol/H20 with toothpick,) drip several drops of Platinum ink into spritz bottle.  As each drop drips into spritz bottle, clean toothpick by scrapping excess ink onto the spritz bottle's opening edge.  
4.  Close spritz bottle and shake vigurously.
5.  Test by spraying a scrap piece of card stock.  If more sparkle is desired, repeat step #3 as many times as desired.
 
To order All-Purpose Ink for Fantastix from Stampin' Up! visit http://alwaysstampinwithkelly.blogspot.com/

Sunday, February 28, 2010

Scrapbooking Tips


TIP TIP TIP
Most scrapbooking experts will encourage you
to USE YOUR OWN HANDWRITING.
To speed up my scrapbooking process
and finish as many pages as possible,
I will use my own handwriting,
not only in my journaling, but in my title as well.
*
Here's a tip for you if you don't like your handwriting...
when scrapbooking with a friend,
ask her (or him) to write something for you
(as long as you admire their handwriting, that is.)
Provided you don't ask them to write a novel,
I am sure they would be
more than happy to push your pen!
*

TIP TIP TIP
Squeeze it in!
Most scrapbook pages I see online
or in scrapbook magazines/idea books
always seem to sport only one photo.
Are you kidding?!
I have so many photos I want to cherish
and so many memories I want to keep.
I would have a gazillion albums
if all of my pages had only one photo on them!
*
Trim and tilt one or two photos
to "squeeze them in" and onto your page.
You can see I've done this to both pages above and below.
This will actually add dimention to your page.
It's fun too!
*

Sunday, February 21, 2010

Scrapbooking Tips


TIP TIP TIP
Most scrapbookers already know this tip
but I believe it's well worth repeating.
Use up those sticker letters!
I love the sheets of BIG sticker letters
but most of the time there is only one of each letter.
You can trim most any letter to create
the letter you need for your title.
Notice below how I trimmed a "C"
to create my "U" in the word "FuN."
*

Sunday, February 14, 2010

Scrapbooking Tips


TIP TIP TIP
Flip it!
I love to visit Triple the Sketch or Page Maps
when I am scrapbooking!
By utilizing skeleton sketches (black & white layouts,)
I can use one sketch and "flip it" four times
to create four different pages and looks.
Talk about speedy scrapbooking!
*
Notice how these two pages are pretty much the same.
The page above has two photos at the top
while the page below has two photos at the bottom.
The single photo above verticle with the page
while the photo below is horizontal.
The journaling block above is coming from the single photo
while the block below is coming from the two photos.
Otherwise, everything is the same.
*

Sunday, February 7, 2010

Scrapbooking Tips


TIP TIP TIP
USE THAT DECORATIVE PAPER!
Many decorative papers can be used for
many different themes and photos.
Take a look at this decorative paper.
It's neither masculine nor femanine.
The colors work well for just about any theme.
Even if your photos are not from the same event,
the same decorative paper can be used for
several pages continuously and still look very nice.
When I use the same paper on several pages,
my work area stays cleaner longer
which allows me to work more efficiently and quickly.
*

Tuesday, February 2, 2010

Still Celebrating 20 Years!


*

To continue my celebration of
TWENTY YEARS
with my best friend,
I've created him a little photo pocket card.
*
Notice how the adorable little cards
just tuck right into the pockets.
How cute is that?!
*
This photo pocket card was created with
just ONE sheet of 12x12 patterned paper.
It's a cinche to create!
You will want to check out my
Always Stampin' blog soon
for the instructions on how to make your very own.


I just love what these little cards say!
*

Very appropriate...
since he IS my best friend!
*

I'll be makin' his absolute favorite dinner...
Spinach Manicotti
and Carrot Cake
(well, I just might have to grab some help from
Sweet Stuff in New Albany on the Carrot Cake! he he)
*

And he just gets sweeter and sweeter!
Here's wishing you a sweet day!

Sunday, January 31, 2010

Scrapbooking Tips


TIP TIP TIP
I love using CHIPBOARD LETTERS on my titles!
These are so inexpensive and easy to apply.
However, some of them can be rather large
so fitting an entire title of big chipboard letters
into one title would overwhelm my photos.
I like to use only ONE chipboard letter to begin my title.
The other letters in my title can be created with
stamps, stickers, or diecuts (as I've used here.)
*

TIP TIP TIP
Stumped on embellishments?
Slap on a sticker or two!
I don't always match every single aspect of my page.
As you can see here, these stickers
don't coordinate perfectly with the other page elements.
That's okay.  The little orange fish pops and looks adorable!

Thursday, January 28, 2010

In Love Half My Life...


My Best Friend and I have been together now for
nearly TWENTY YEARS
and I want to surprise him with some fun lovin'
the week of our celebration.
*
I've created this fun little "pop-out box"
that will explode when he opens it.


Once open, this cute little exploding box
will contain a sweet sweet message...
*

along with some of his favorite sweets!
I plan to make some of his favorite "cookies"
(I know... very appropriate, huh?!)
and place a couple of them on top of the little card.
*

Then, of course, I will treat him to lunch!
Aren't these papers and cards just adorable?!
*

My sweetie's favorite cookie...
CLEAN COOKIES
1 box cake mix
(any flavor, but his favorite for this recipe is white or yellow)
4oz whip topping
1 egg
Mix all together.  Roll into 3/4"-1" size balls.
Roll in powder sugar.
Bake at 350 degrees for 8-10 minutes.
YUM!
My son calls these "clean and dirty cookies" because
the chocolate ones look "dirty" and the white look "clean."
he he he.

Monday, January 25, 2010

"Pop-Out Valentine" at Lavender Sentiments


You seriously HAVE to join me
this Thursday at Lavender Sentiments
this Thursday at 6:00pm
to create this adorable Valentine card!
*
When folded, it looks like this "sweet heart" pictured above.
When opened...


POW!
It explodes into this amazing 12x12 bundle of hearts!
And it is so fun and easy to create!
You will love the pattern!
*

Along with the "Pop-Out Valentine,"
we'll also create this 2-page 12x12 spread
of lovey dovey goodness...


I hope to see your "sweet heart" there!
Blessings!

Sunday, January 24, 2010

Scrapbooking Tips


TIP TIP TIP
Along with one of last week's tips
about using STICKER LETTERS
to speed up the scrapbooking process,
this week's tip is about sticker letters as well.
*
What to do with all of those left over letters?
COMBINE THEM.
Create a title using two to three different colors
(and yes, even two to three different styles)
of sticker letters.
*

Saturday, January 23, 2010

With Cheerful Sympathy


It seems I've been having to make
so many sympathy cards lately.
I thought I'd take a break from
the usual "lovely" floral design I usually create
and try a more cheerful look.
*
Here is wishing you and yours a "cheerful" day!

Sunday, January 17, 2010

Scrapbooking Tips


TIP TIP TIP
You ready for this one...
DO NOT BE CREATIVE!
Yes, I can hardly believe those words came from my mouth.
If you know me personally,
you know this is not something I would usually encourage.
Hear me out on this one.  he he he.
There are so many amazing designers around!
Let them create for you!
COPY COPY COPY!
*
Sometimes I will create from a skeleton sketch
(such as the ones you see on Triple the Sketch or Page Maps)
and sometimes I will create from a finished page of someone else's.
My paper and embellishments can be completely different.
My placement of those items can be exactly the same.
I get so many pages completed using this tip!
 *

*

TIP TIP TIP
"Stick to it!"
Using sheets of sticker letters really speeds
up my scrapbooking process.
I actually prefer to STAMP my titles because
I can create a much more eye-catching title with stamps.
However, since I have SO MANY photos
I'd like to have in albums and
very little time to get them there,
I need super fast techniques to speed the process.
*
When I am scrapbooking multiple pages at one time,
I will use the same sticker sheet on many of my pages
(especially if the theme is the same.)
This may seem a bit boring to some scrapbookers
but again, I'm going for speed.
And let's face it, when my family members
are looking at my albums long after I am gone...
the great great grandkids aren't going to notice
that Granny used a certain lettering system over and over.
he he he.
   *

Sunday, January 10, 2010

Scrapbooking Tips for the New Year


In 2010, I plan on scrapbooking much more than I use to.
I LOVE scrapbooking!
It is such a fun way to remember!
I've also decided to share some scrapbooking tips
with you, my friends/readers.
Not that I am an expert on scrapbooking by any means...
these are tips that encourage me to preserve memories
in a way that enrich not only the lives of my own family members
but of those I know and love as well.
How can I resist sharing with YOU?!
*

TIP TIP TIP
Top loading albums are my favorite ablums to use
when I preserve photos into a scrapbook.
These albums give you the chance to "go back"
and add, take away, or rearrange pages if you need to.
*
I have created scrapbook pages within hinged albums
only to end up finding a few photos that were misplaced
or were chronologically out of order.
*
Top loading albums make my scrapbooking
chronologically easy to stay "on track" with scrapbooking.
Hinged albums are very nice.
I personally prefer top loading albums
due to the reasons stated above.
  

TIP TIP TIP
I can save money and card stock by utilizing
BOTH SIDES of my scrapbook page.
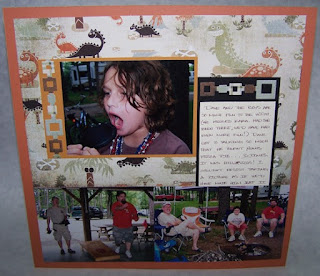
Notice the base of these three pages is
a bright orange card stock.
My first page (titled "fun and games") is actually
the reverse side of my second page (untitled.)
NOTE...
This technique can only be performed
when my pictures are in chronological order
and I know for sure I have no other pictures to add within the
time frame of the pictures I am working with at the time.